When it comes to exercise selection, the world of fitness offers a seemingly endless array of options. Whether you’re designing a workout for the first time or have been on a fitness journey for a while, the choices can be overwhelming. The burning question is, which exercises are the right ones for you? The answer is simple but transformative: personalized exercise selection.
Customizing your exercise choices for your workouts can be a game-changer in your fitness journey. It’s not about one-size-fits-all routines; it’s about tailoring your workouts to your unique needs, goals, and abilities. In this article, we’ll delve into some essential frameworks for exercise selection, that will empower you to design workouts that truly serve you and elevate your fitness coaching game.
Framework #1: Assess Don’t Guess
Assessment is the foundation for intelligent exercise selection. It’s essential to understand your own movement patterns, strengths, and limitations. Don’t guess or assume which exercises are suitable for you. Instead, take a systematic approach. You can use the OPEX Move assessment as a guide, which provides valuable insights into your individual needs and abilities.
Framework #2: Contraction Progression
Contraction types play a significant role in exercise selection. Depending on your training age and abilities, some contraction types may be more suitable than others. We categorize contractions into three types: Motor Control, Strength Endurance, and Max Contractions. Contraction progression guides you in choosing exercises that match your specific training age, whether that’s Beginner, Intermediate, or Advanced.
Finally, exercise intention is all about setting clear objectives for each exercise. Before adding an exercise to your routine, define its purpose: Is it to learn a new movement pattern, grow muscle or muscle endurance, or express maximum strength. This framework ensures that your workouts have a clear focus and are aligned with specific fitness goals.
What movements is my client capable of, and where do they face limitations?
What contraction types should I incorporate to support their fitness goals?
What is the intention behind the workout, and how can exercise selection serve this purpose?
Let’s put these frameworks into practice with some examples:
Exercise Selection: Squat
The squat is a fundamental exercise that involves hip and knee flexion. It’s an essential movement pattern you use in your daily life, whether it’s sitting down, getting up, or picking up objects from the ground. To personalize this exercise, consider your exercise intention. Are you looking to learn the proper squat form, grow your strength, or express your current abilities? Choose variations such as the goblet squat, cable cyclist squat, or traditional back squat based on your intention.
Exercise Selection: Bend
The bend pattern, involving hip flexion to extension, is crucial for daily activities like picking objects off the ground. Customizing this exercise involves selecting movements that enhance your bend pattern. For learning and building resilience, include exercises like the single-leg Romanian deadlift or the Romanian deadlift. If your intention is to express your strength, incorporate the traditional deadlift.
Exercise Selection: Lunge
The lunge pattern is highly functional, mirroring activities like walking, climbing stairs, and lunging forward. Personalize this exercise by selecting movements like the unloaded rear foot elevated split squat, dumbbell front foot elevated split squat, or dumbbell rear foot elevated split squat, depending on your intention.
Exercise Selection: Push
Push exercises are essential for daily activities like pushing objects away from your center of gravity. For learning, growing, or expressing your abilities, consider exercises like the scapular push-up, dumbbell bench press, or strict press.
Exercise Selection: Pull
The pull pattern involves bringing objects closer to your center of gravity, and it’s essential for various daily tasks. Choose exercises that match your intention, such as the dumbbell prone row, seated lat pulldown, or weighted pull-up.
Exercise Selection: Core
Core exercises target your abdomen and obliques, which are crucial for activities that require bracing, twisting, or sitting up from a supine position. Personalize your core exercises with movements like the dead bug crunch, cable crunch, or front squat, based on your learning, growth, or expression goals.
Conclusion
Personalized exercise selection is the key to unlocking the full potential of your clients’ fitness journeys. By applying these essential frameworks, you can tailor workouts to their unique needs and goals. With intelligent assessment, contraction-specific exercises, and clear exercise intentions, you’ll design workouts that are not only effective but also enjoyable. Customized exercise selection isn’t just about working out; it’s about working out with purpose and intention for lasting results.
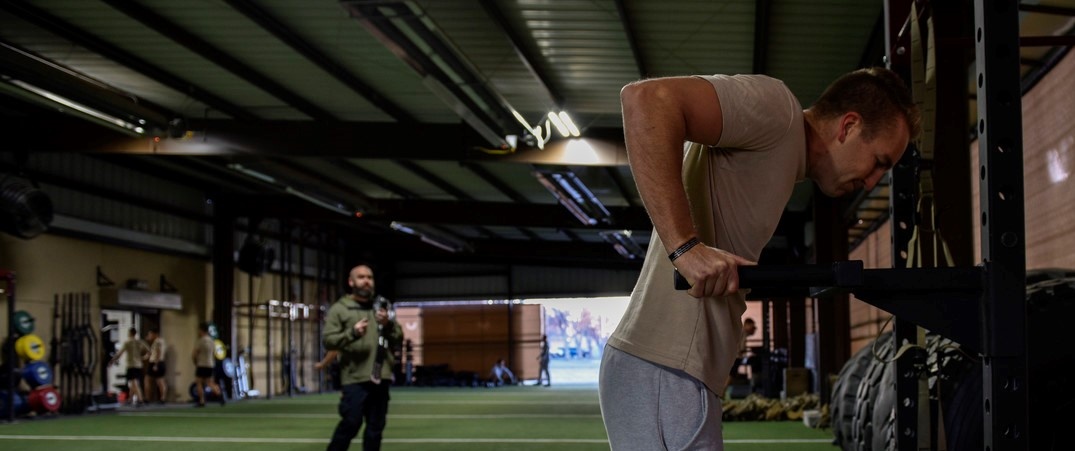
Today you learn one of the most underrated exercises of all time: the dip.
It’s something we remind our coaching clients not to overlook, and I’m excited to share the exercise with you today.
Here’s what we’ll cover so you can learn the bodyweight dip:
A quick note: we have compiled ALL of our strength training content into a comprehensive guide that will remove all the confusion and answer all the questions you have about weight training! Grab our guide, Strength Training 101: Everything You Need to Know, when you sign up in the box below!
What Is the Dip Exercise? What Muscles Does the Dip Train?
The dip is a compound, bodyweight exercise.
You grab two parallel bars, hoist yourself up, and then lower your entire body by bending your elbows.
When you hear “compound exercise,” it’s referring to multi-joint movements that work several muscles or muscle groups at the same time.
The dip exercise trains your:
Chest
Shoulders
Tricep
Back
Abs
You may be thinking, “abs?”
Yep! You need to stabilize your body as you raise and lower yourself.
Which is one of the reasons bodyweight dips are so great!
Some would even argue that dips are the best chest exercise out there, even better than the bench press.
There’s some logic to it.
When you think about it, the bench itself offers a lot of support during the bench press. So do your legs.
With the dip exercise, your upper body is supporting your entire body. Thus a fuller workout.
Instead of isolating your chest for 5 exercises, your shoulders for 5 exercises, and triceps for 5 exercises, just do dips!
Don’t hop up there and then lower yourself unless you’re fairly confident you can get through at least one of these things. We can’t have you tearing any muscles or falling on somebody, because that would suck.
Grab the parallel bars (or rings), and hoist yourself up. At this point look straight ahead, and contract your stomach muscles (just like when you do squats and deadlifts). If you’re keeping your abs tight for all of these exercises, you’ll never have to do a crunch again and you’ll still have washboard abs.
Bend your knees if you like (so your feet are behind you), for stability purposes, but keep your head up and look straight ahead.
Keeping your elbows at your side, lower yourself until your triceps are parallel to the floor. A lot of folks will recommend you go past parallel, but I think this puts too much strain on your shoulders at a weird angle and can cause injury/discomfort. I only go down to parallel and haven’t had any issues, so I’d recommend the same.
Once you hit parallel, explode back up until JUST before you’re able to lock your elbows. By not locking your elbows, you keep the tension in your muscles and don’t jack up your joints. w00t.
Now do another one. And then another!
Those are dips.
Keep your elbows as tight as possible, engage your abs, and hold your body in balance as you go up and down.
Are you doing it right?
Check your form by recording a video of yourself and matching it against the videos and gifs here. If it looks close then you’re doing great!
Want to have an expert review your form? Our coaches can do just that in our spiffy app!
What If I Can’t Perform a Dip? (Progression Plan)
If you don’t quite have the strength to do a full bodyweight dip, follow our progression plan below.
You’ll be doing the complete dip movement before you know it!
Level 1 Dip Progression: Knee Push-Ups
If you’re just starting to develop your push muscles, our first stop will be knee push-ups. We’ll build your strength up so you can start doing…
Push-ups will help you develop chest muscles for doing proper dips. Only after you can do 20 proper push-ups should you consider trying to do a dip.
Level 3 Dip Progression: Assisted Dips
It’s now time to do some dips! With a little bit of assistance…
We’ll use a resistance band to help support your weight while you grow stronger. You can progress with weaker and weaker resistance bands until you feel comfortable trying a proper bodyweight dip.
That’s a great option as well, though it may be harder to find one in your area unless you belong to a gym.
A dip machine provides a consistent amount of assistance throughout the range of motion. While a resistance band gives you the MOST help at the bottom of the range of motion, and the least at the top. Depending on your goals, a dip machine can actually be BETTER at helping you slowly build strength across the full range of motion!
Ultimately, we want you to use whatever you have available to perform the movement. Whether that’s a machine, a resistance band, or using your feet to help push off the ground, dips are a great way to build upper body strength!
ALSO, if you find yourself getting stuck on “assisted dips,” you’re not alone.
We work hand-in-hand with people like you to master bodyweight training in our Online Coaching Program. If you don’t know how to add dips into your workouts, or you just want somebody to give you the exact workout to follow every day, we got you!
Tips and Tricks for Performing the Dip Exercise
Here are some extra tips on getting better at dips:
#1) Get your setup correct at the start.
When people experience pain with their dips, it’s probably one of two things:
When your arms go too far back, they can close off the shoulder and start to cause pain.
If you allow your shoulders to round forward during the movement, it can again close off the area and create discomfort.
#2) Don’t swing – this goes for practically every exercise. If you start swinging your body as you go up and down, you take the emphasis off the muscles you’re actually trying to work.
Save swinging for the playground:
#3) Don’t flare out your elbows if you can avoid it – the more “out” your elbows are, the more emphasis on your chest. Elbows tight = emphasis on shoulders and triceps.
#4) Don’t do half reps – again, this could be another universal rule. Challenge your muscles by bringing your tricepsparallel to the ground, then make sure you extend arms to almost “elbows locked” at the top:
#5) Don’t go too fast – you want to be slow and in control during your dip. When you go too quickly, proper form is often sacrificed. Make sure you train safely by going slowly…this isn’t a race!
Variations on the Dip (Advanced Dip Moves)
Once you can do 3 sets of 15 dips no problem, you have a few options to ramp up the difficulty:
#1) Add weight to your bodyweight dips by:
Picking up a dumbbell between your feet (challenging)
This is all going to be about the chairs or barstools you can find.
The important thing here is the stability of your furniture – don’t pick anything that’s wobbly. However, if you have a couple tall and sturdy chairs or bar stools, you can set them up on either side of you to perform your bodyweight dips.
If they’re too high for you and you can’t quite get your feet on the ground for assisted dips, no problem. Just stand on a few books or a short stool to help you gain support.
Another great option is to perform dips on the corner of two sturdy countertops. As long as you can place your hands to the side so they can face forward, and you have plenty of room to maneuver between them, then you’re solid.
One thing you should be careful with is bench dips, which could be done off of a couch:
The trouble with this comes from your arms being behind you.
As we covered in the “How to Do Pain-Free Dips” video above, this position is a common problem area for causing pain in bodyweight dips. If it hurts when trying the bench dip, stick to the other two home variations above.
When Should You Do Dips in Your Workout? (Getting Started)
Now that you know how to do dips, let’s discuss when to do them.
Unless you’ve been strength training for years and know what you’re doing, we recommend that you pick a full-body routine that you can do 2-3 times a week.
Do your full-body workout and then go play some Nintendo.
Need some help getting started?
I have three great options to help you with your dip and strength training journey:
#1) If you want step-by-step guidance, a custom strength training program that levels up as you get stronger, and a coach to keep you accountable, check out our killer 1-on-1 coaching program:
2) If you want an exact blueprint for crushing dips, check out NF Journey. Our fun habit-building app helps you exercise more frequently, eat healthier, and level up your life (literally).
Try your free trial right here:
3) Join the Rebellion! We need good people like you in our community, the Nerd Fitness Rebellion.
Sign up in the box below to enlist and get our guide, Strength Training 101: Everything You Need to Know. It’ll help you start incorporating dips into your training:
That should get you going on mastering the bodyweight dip.
Alright, now I want to hear from you:
Do you head to the gym to crush dips?
Are you currently progressing through assisted dips?
Any tips or tricks we missed?
Let us know in the comments!
For the Rebellion,
-Steve
PS: Want to learn more? Read the rest of our Strength Training 101 series: